Create your first scenario, cast and lore.
Follow these walkthroughs to build content from the live app screens.
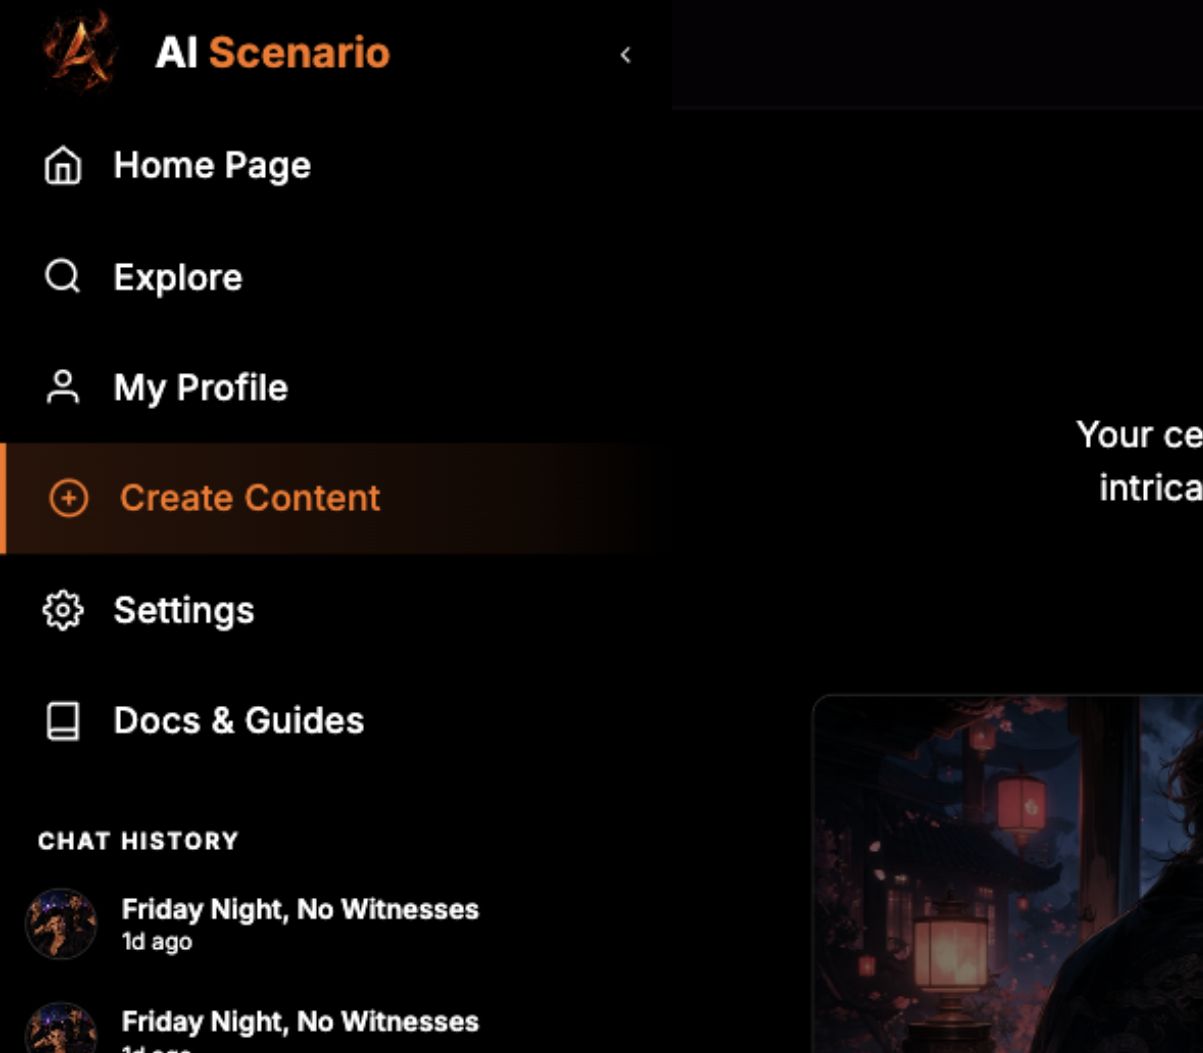
Open Create Content
Start from the signed-in home screen and use the left sidebar to open the creation tools.

Sign in
Use your account, then wait for your profile and sidebar to load.
Open Create Content
Select Create Content in the left sidebar.
Choose a tool
Pick Create Scenario, My Personas, Characters or Lore Vault.
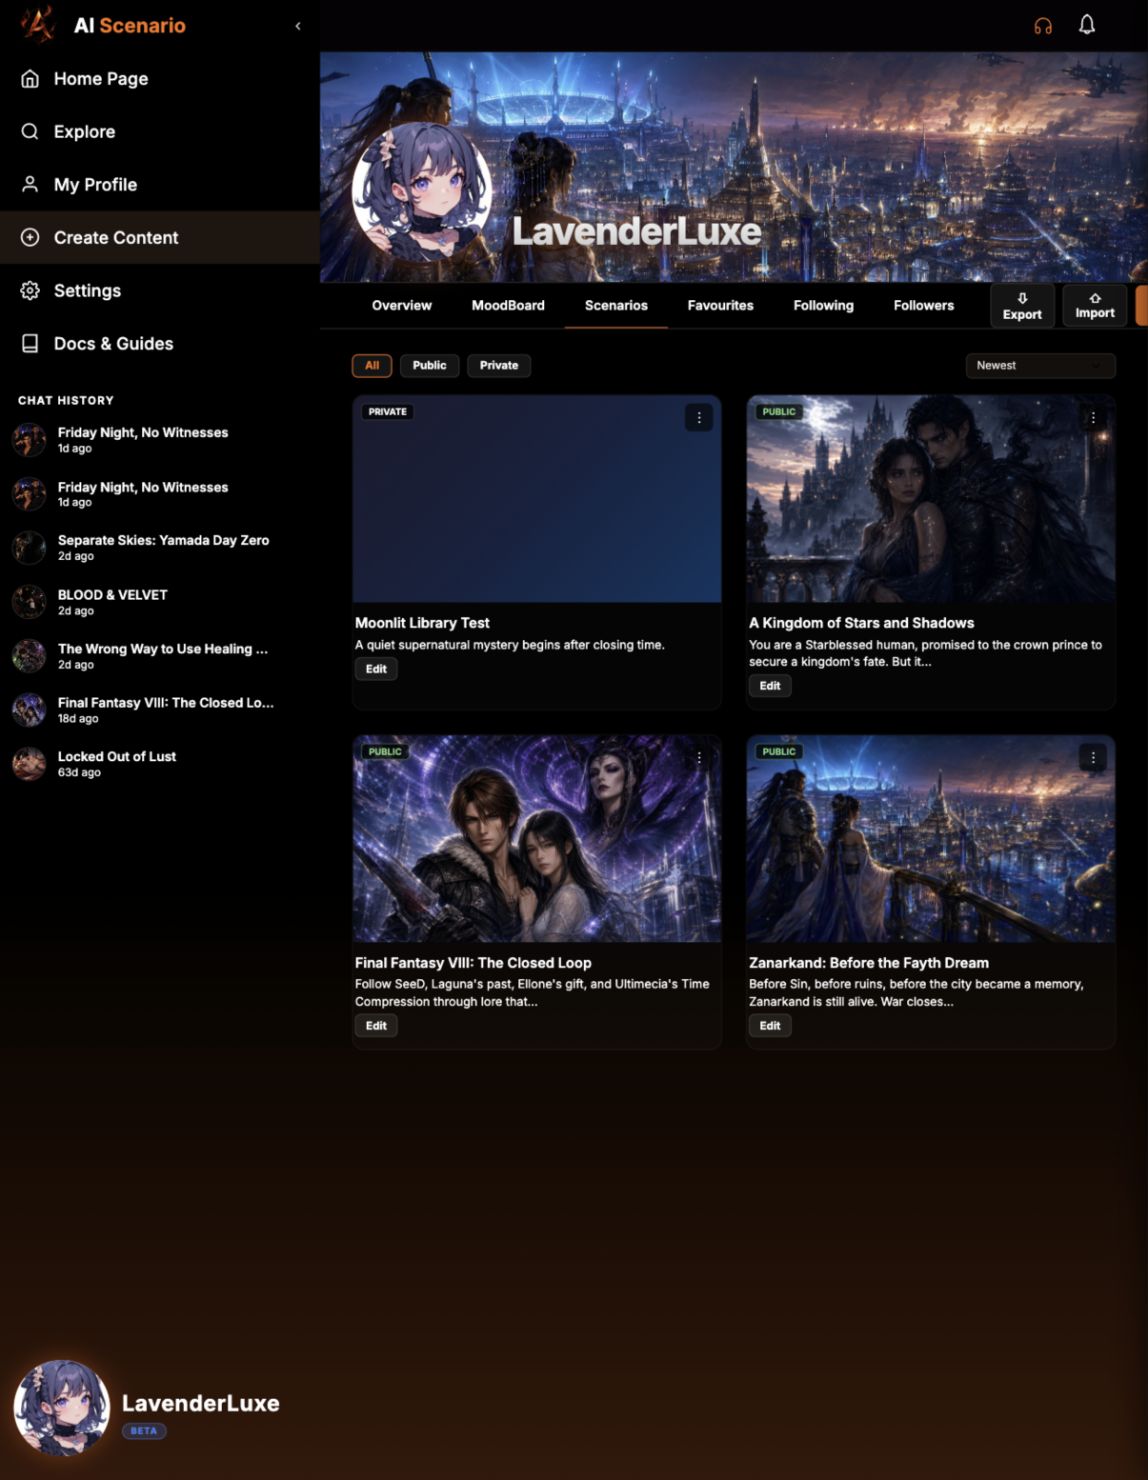
Create a Scenario
Use the scenario editor to set the premise, opening route, cast, lore and publishing status.
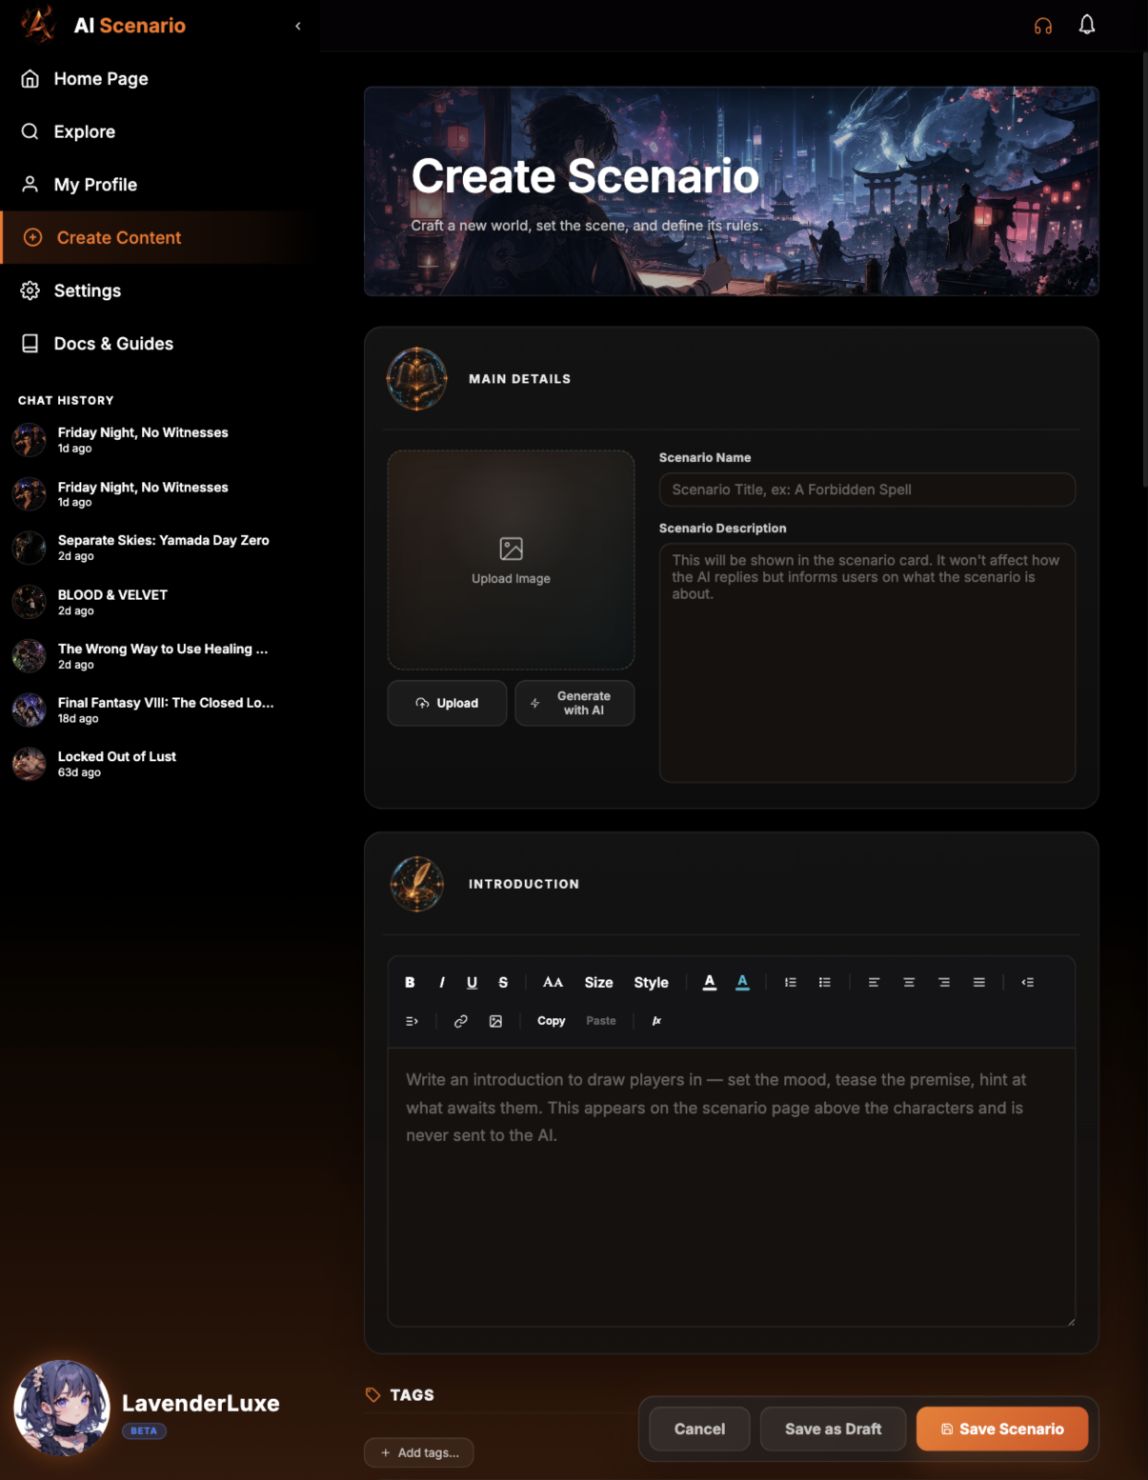
Add the main details
Enter a scenario name, card description and introduction.
Fill World Building
Add the setting, user role, relationships, locations and history.
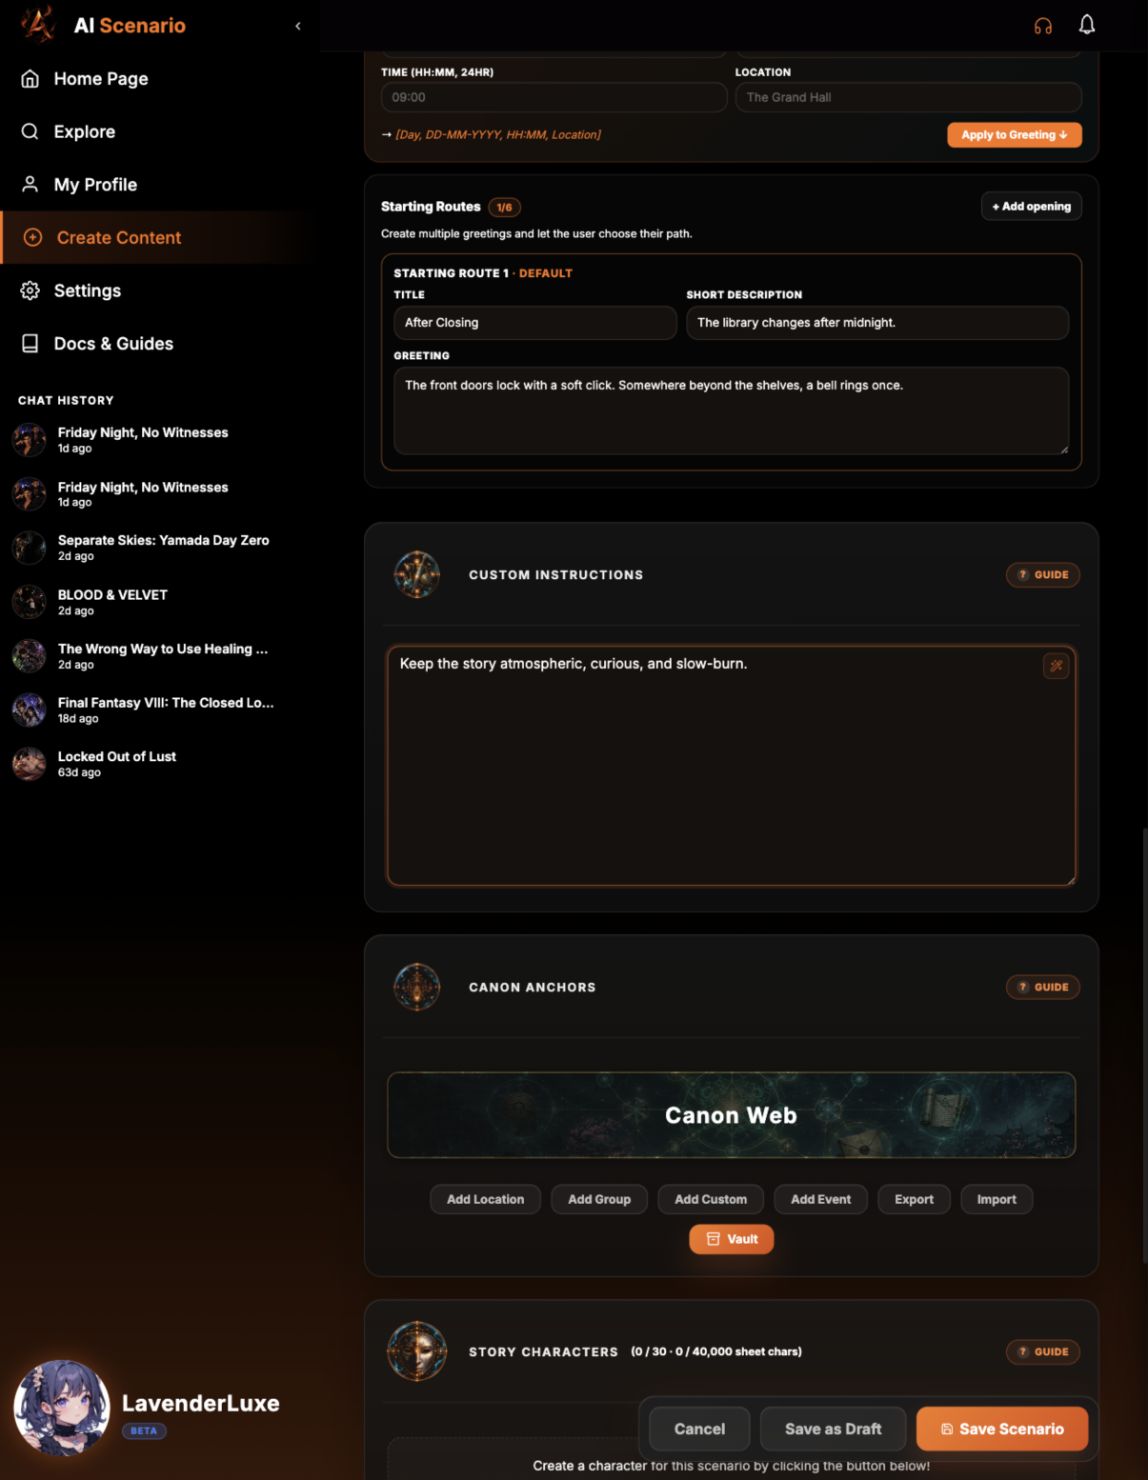
Set the opening
Keep Timestamp Protocol on if you want day, time and place shown. Fill the first starting route with a title, short description and greeting.
Add optional instructions
Use Custom Instructions for tone or style notes.
Add cast and lore
Add characters and Canon Anchors before saving.
Save
Keep the scenario private while drafting. Select Save as Draft, or select Save Scenario when it is ready.
Add a Character to a Scenario
Scenario characters belong to the scenario's starting cast.
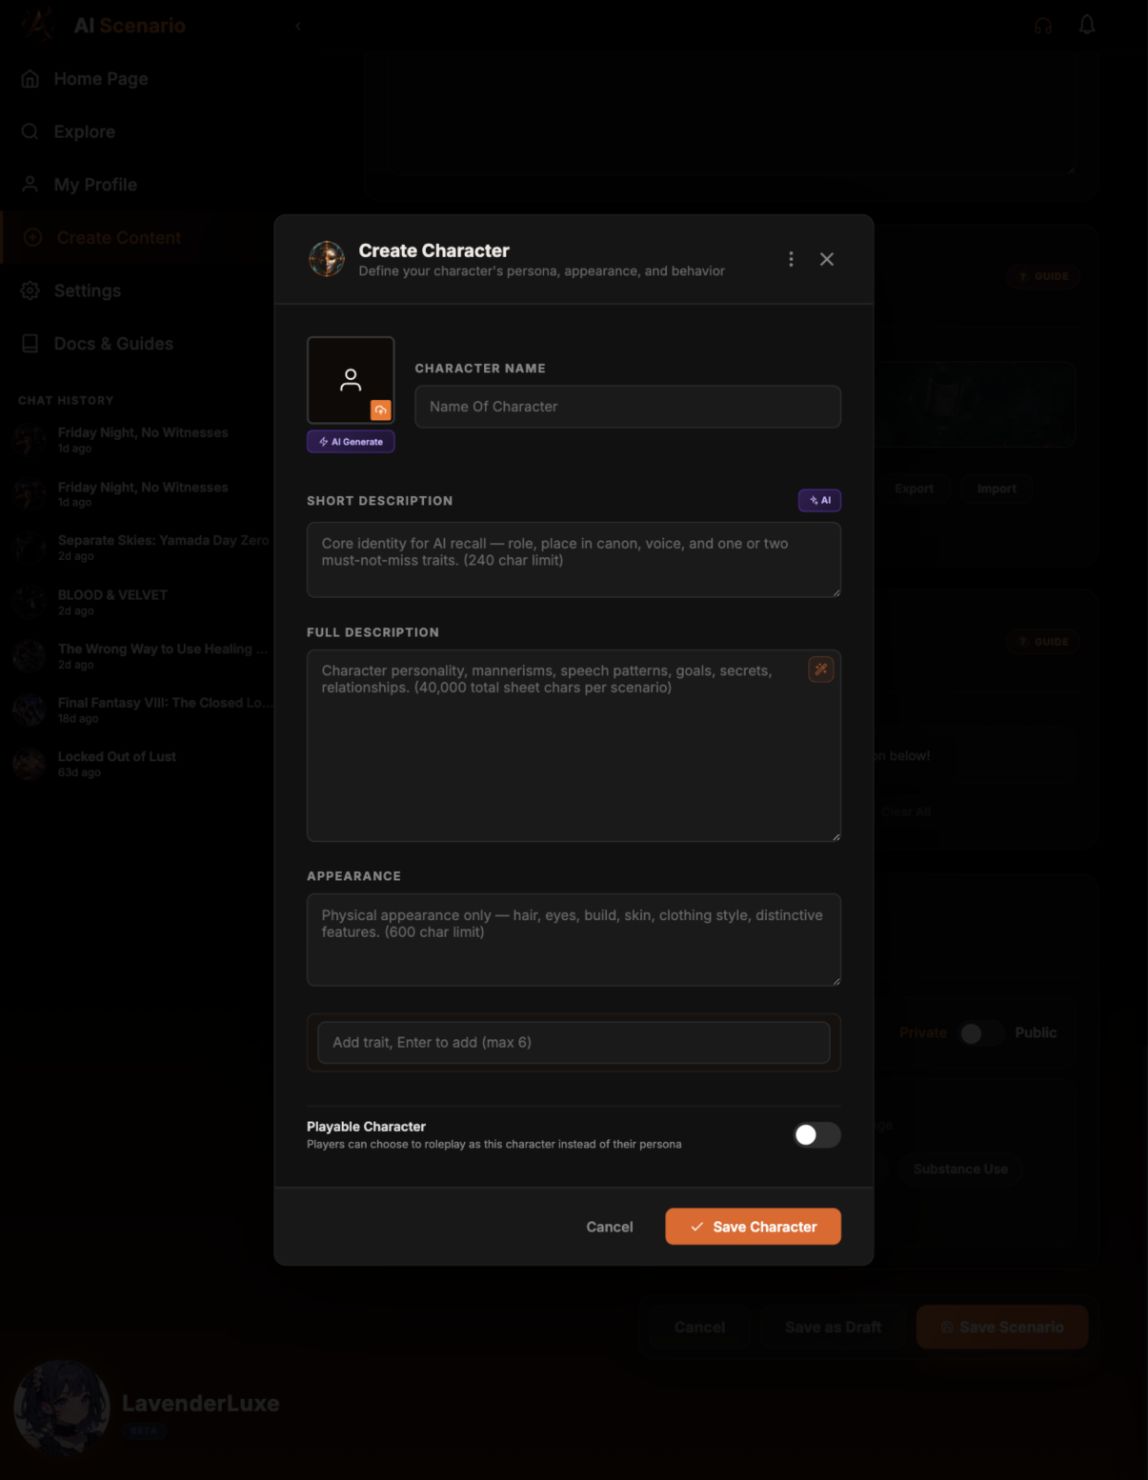
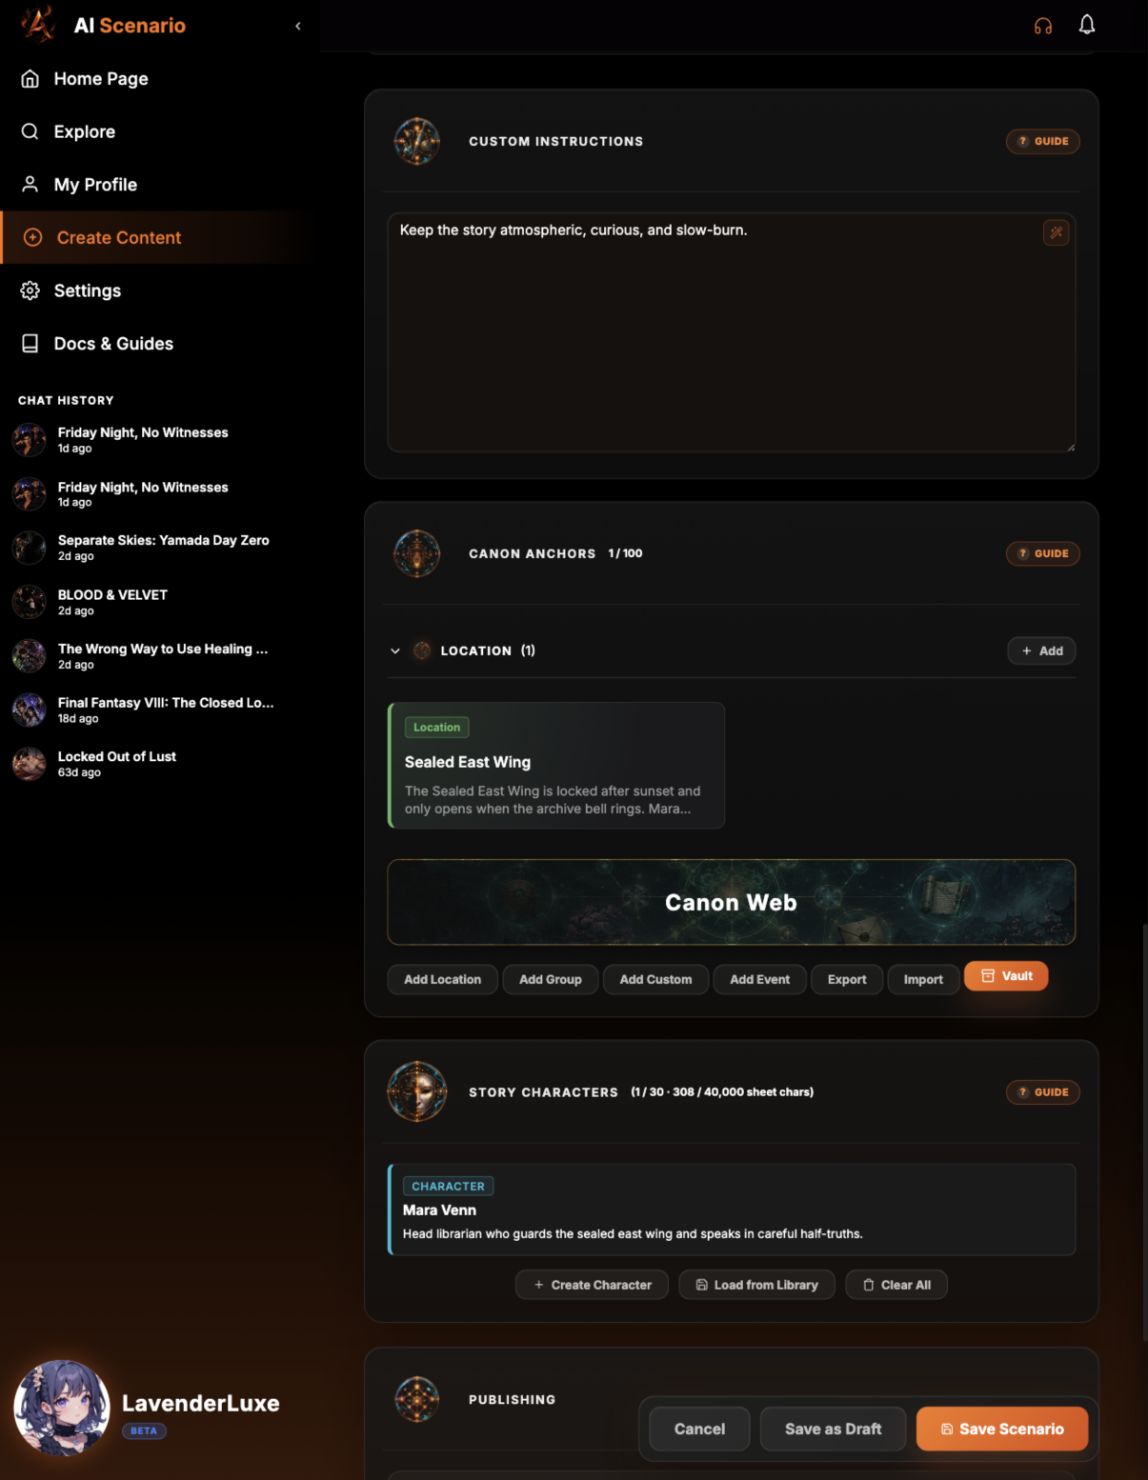
Open Story Characters
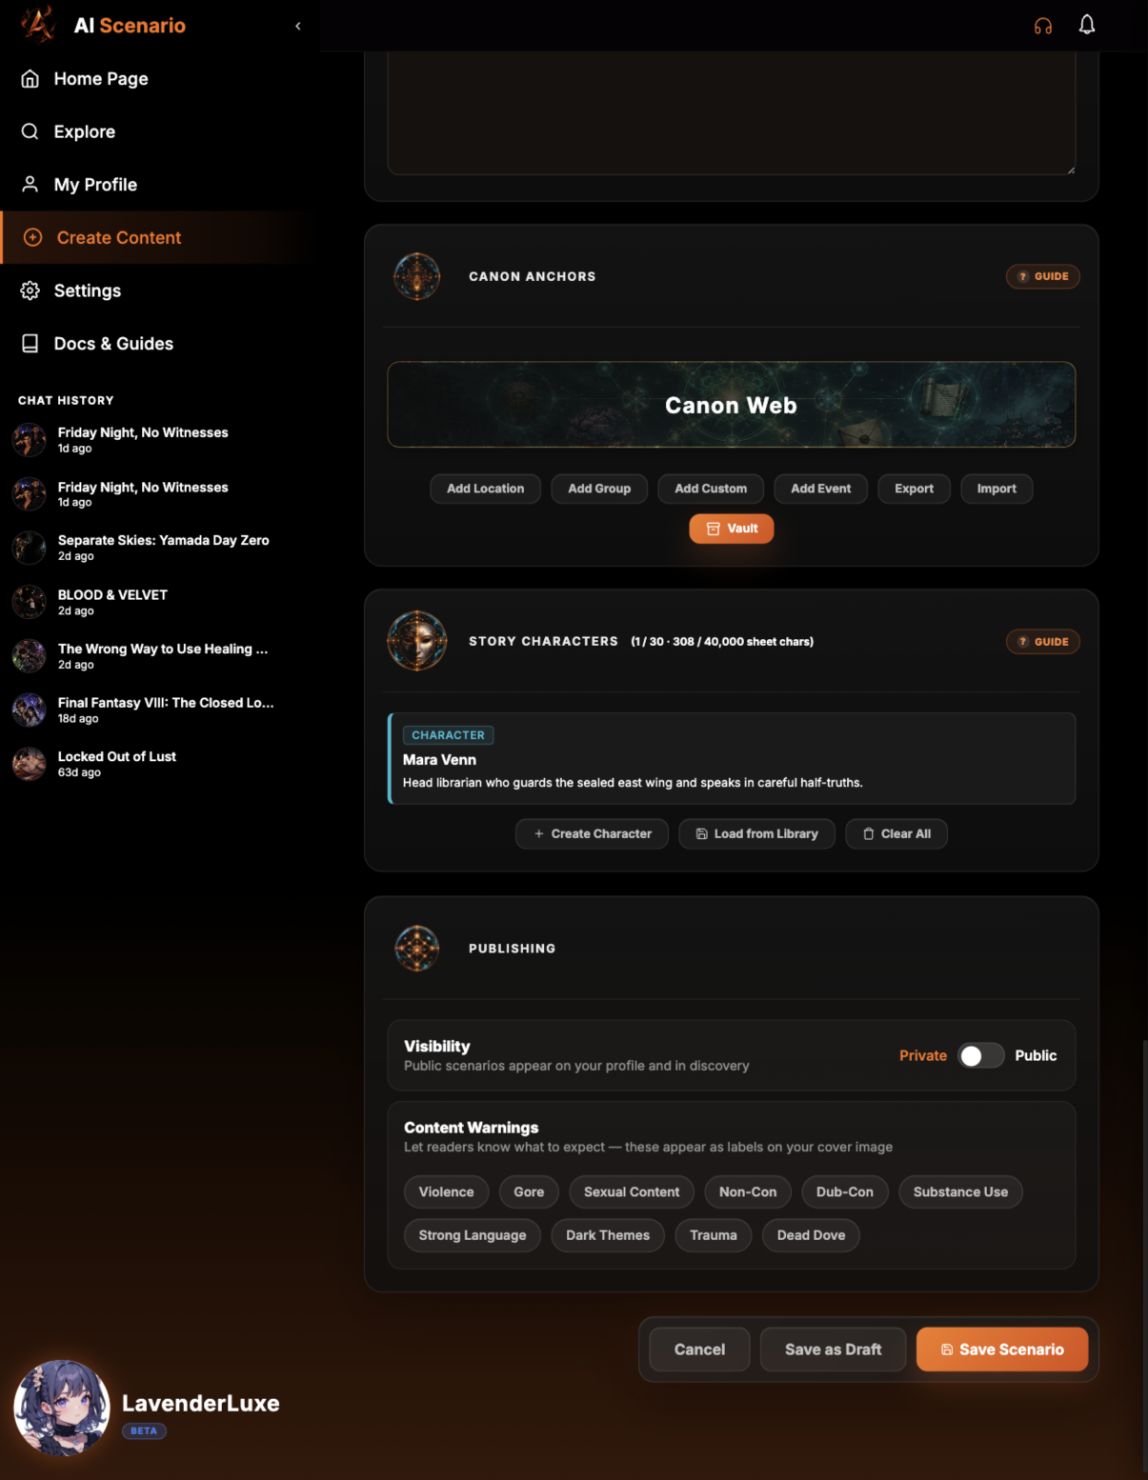
In the scenario editor, go to Story Characters and select Create Character.
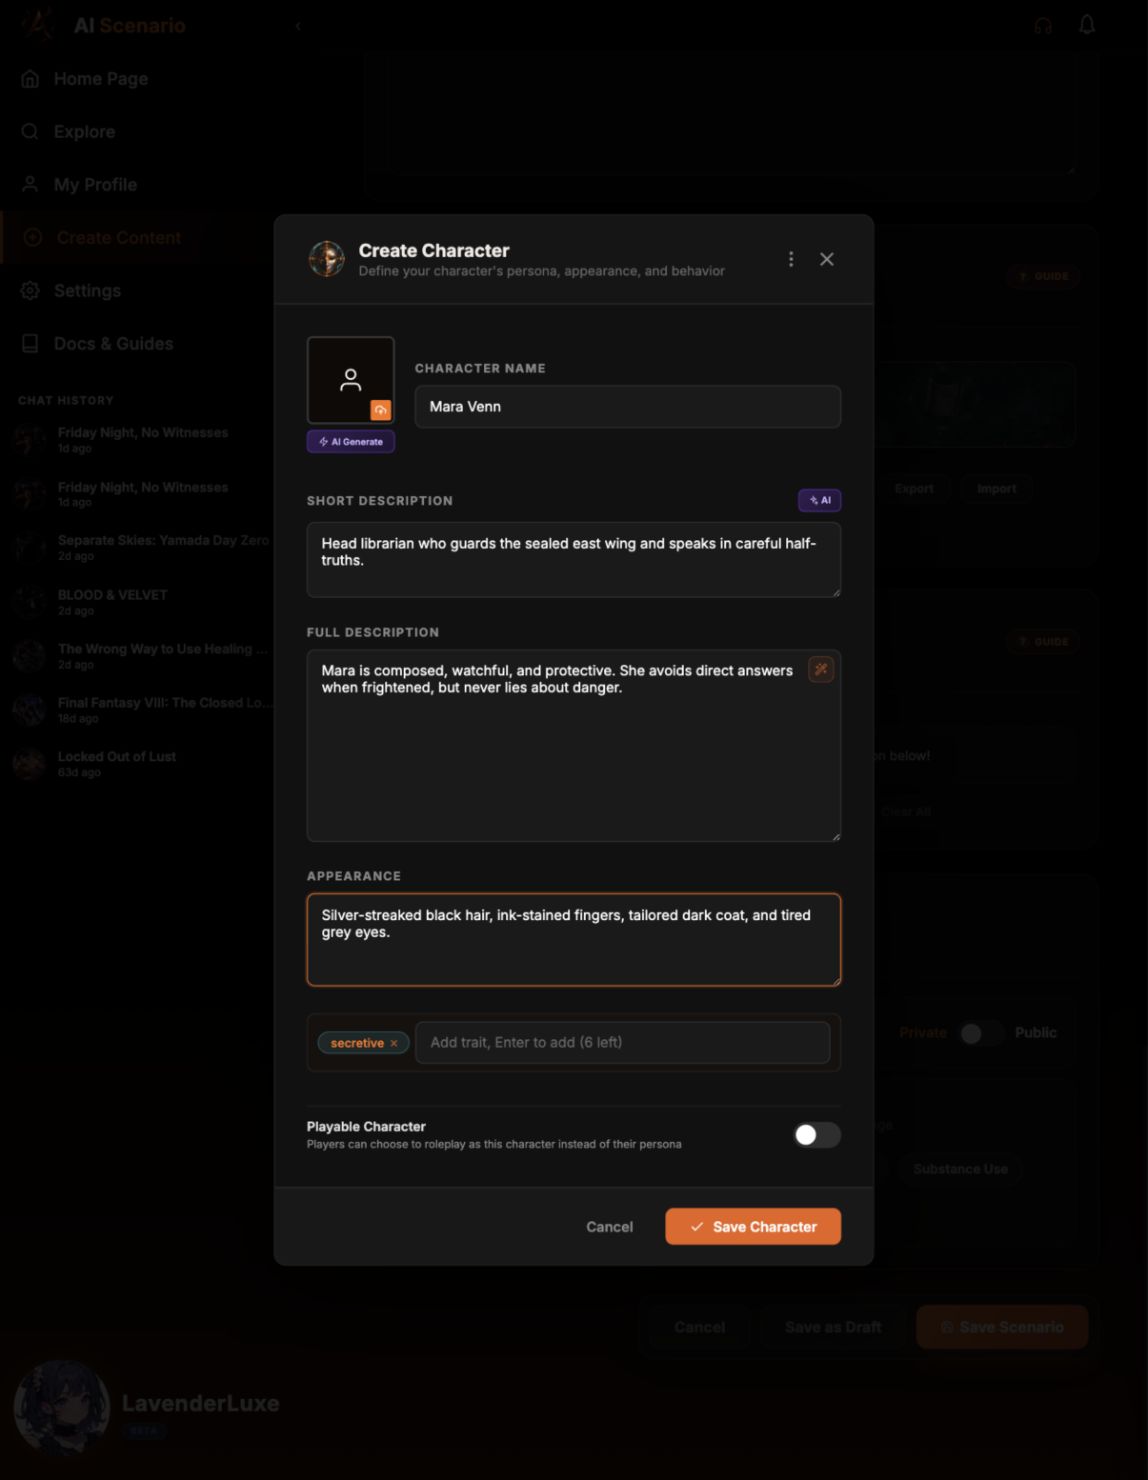
Write the character sheet
Add the name, short description, full description, appearance and traits.
Choose playability
Turn on Playable Character only if users should be able to roleplay as this character.
Save
Select Save Character and check that the character appears under Story Characters.
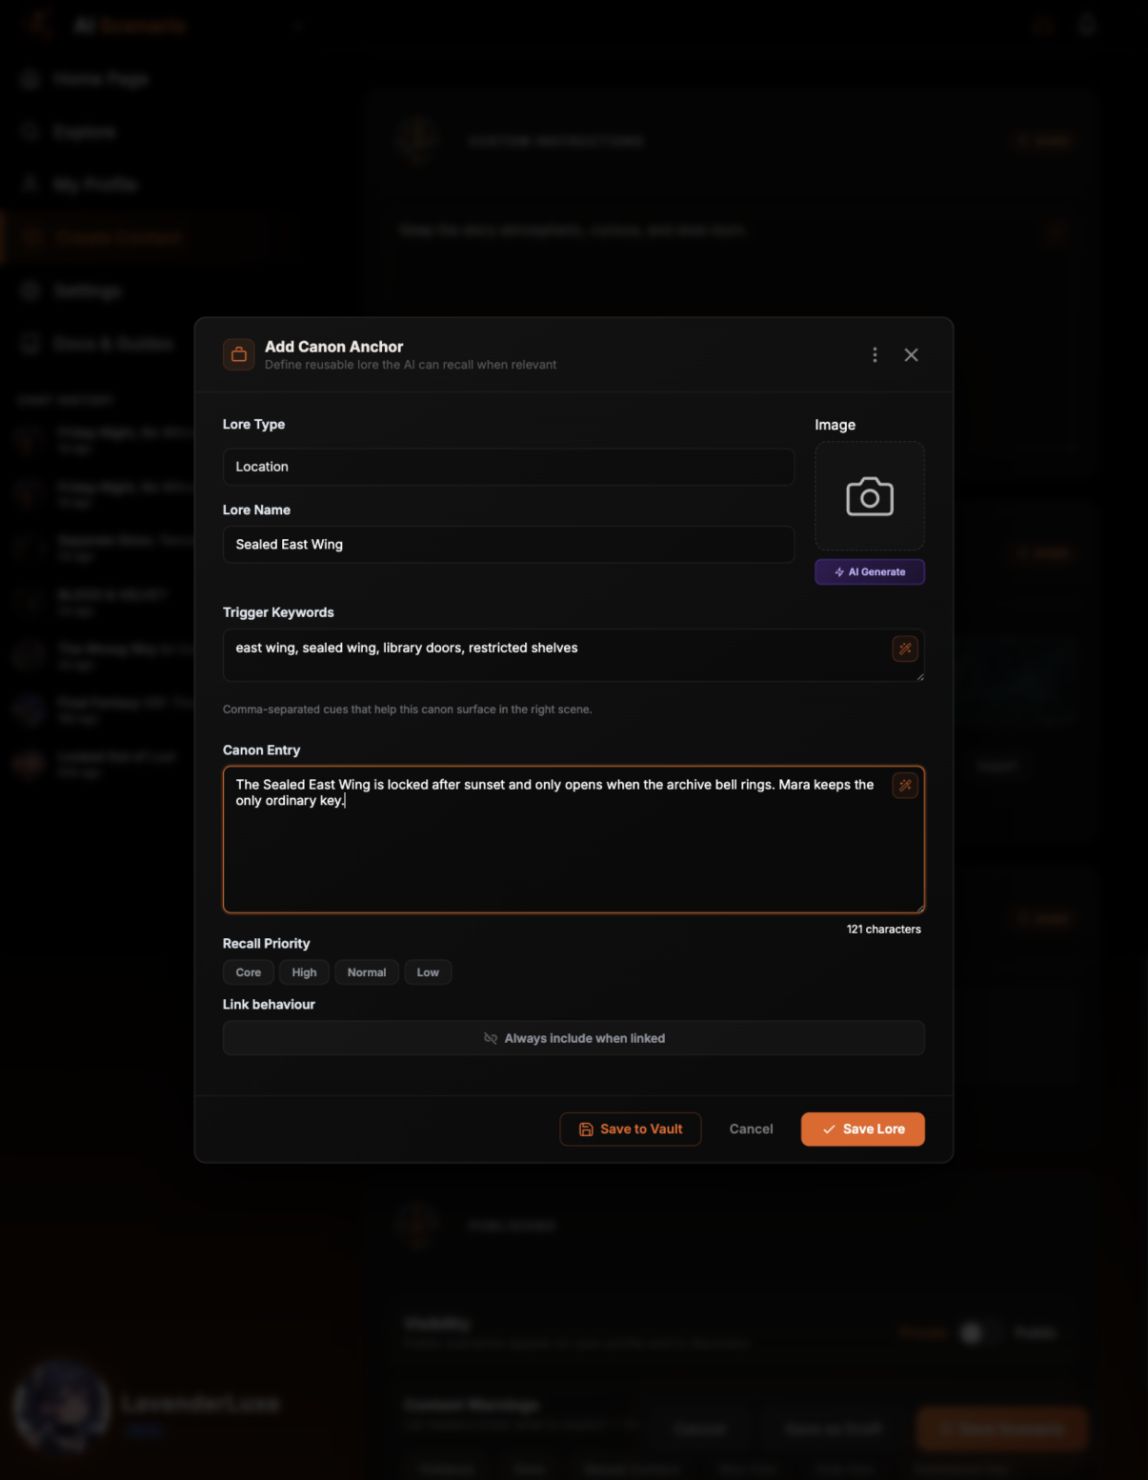
Add Canon Anchors or Event Cards
Use Canon Anchors for facts, places, groups, rules and events that should stay consistent.
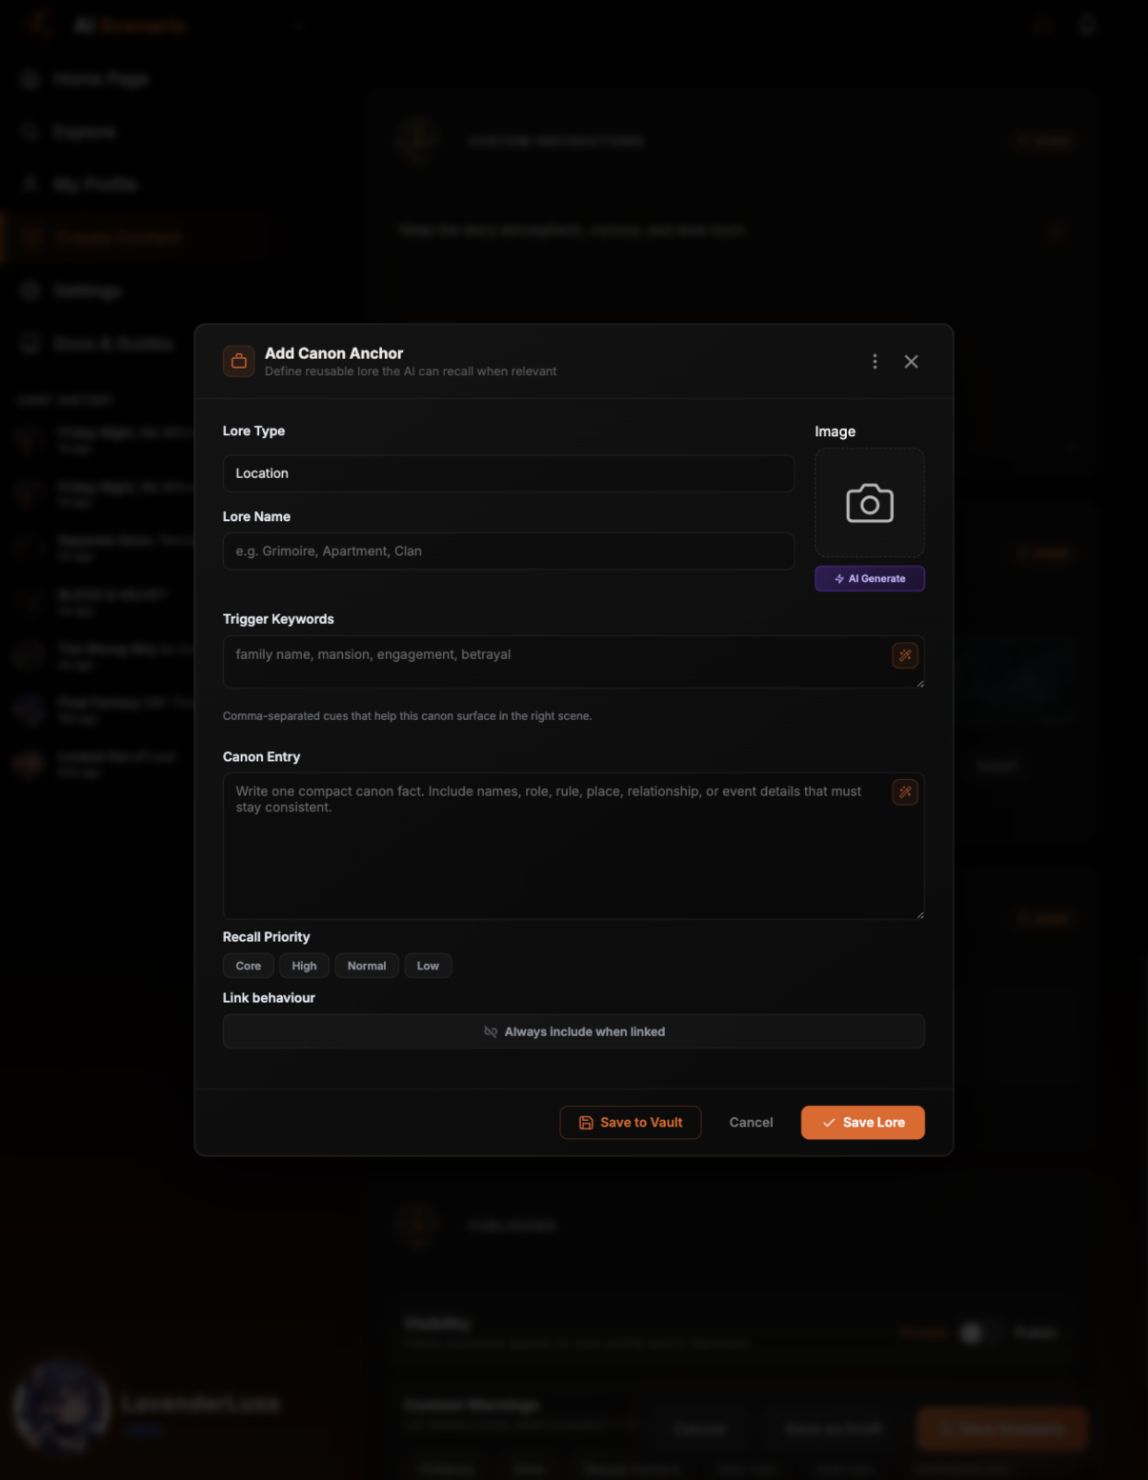
Choose an anchor type
Select Add Location, Add Group, Add Custom or Add Event.
Name the lore
Choose a clear name and add trigger keywords.
Write the canon entry
Write one compact fact that should stay consistent.
Set priority
Choose Core, High, Normal or Low.
Save
Select Save Lore and check that the item appears with the scenario's canon entries.
Create a Persona
Personas describe who you are playing as across scenarios.
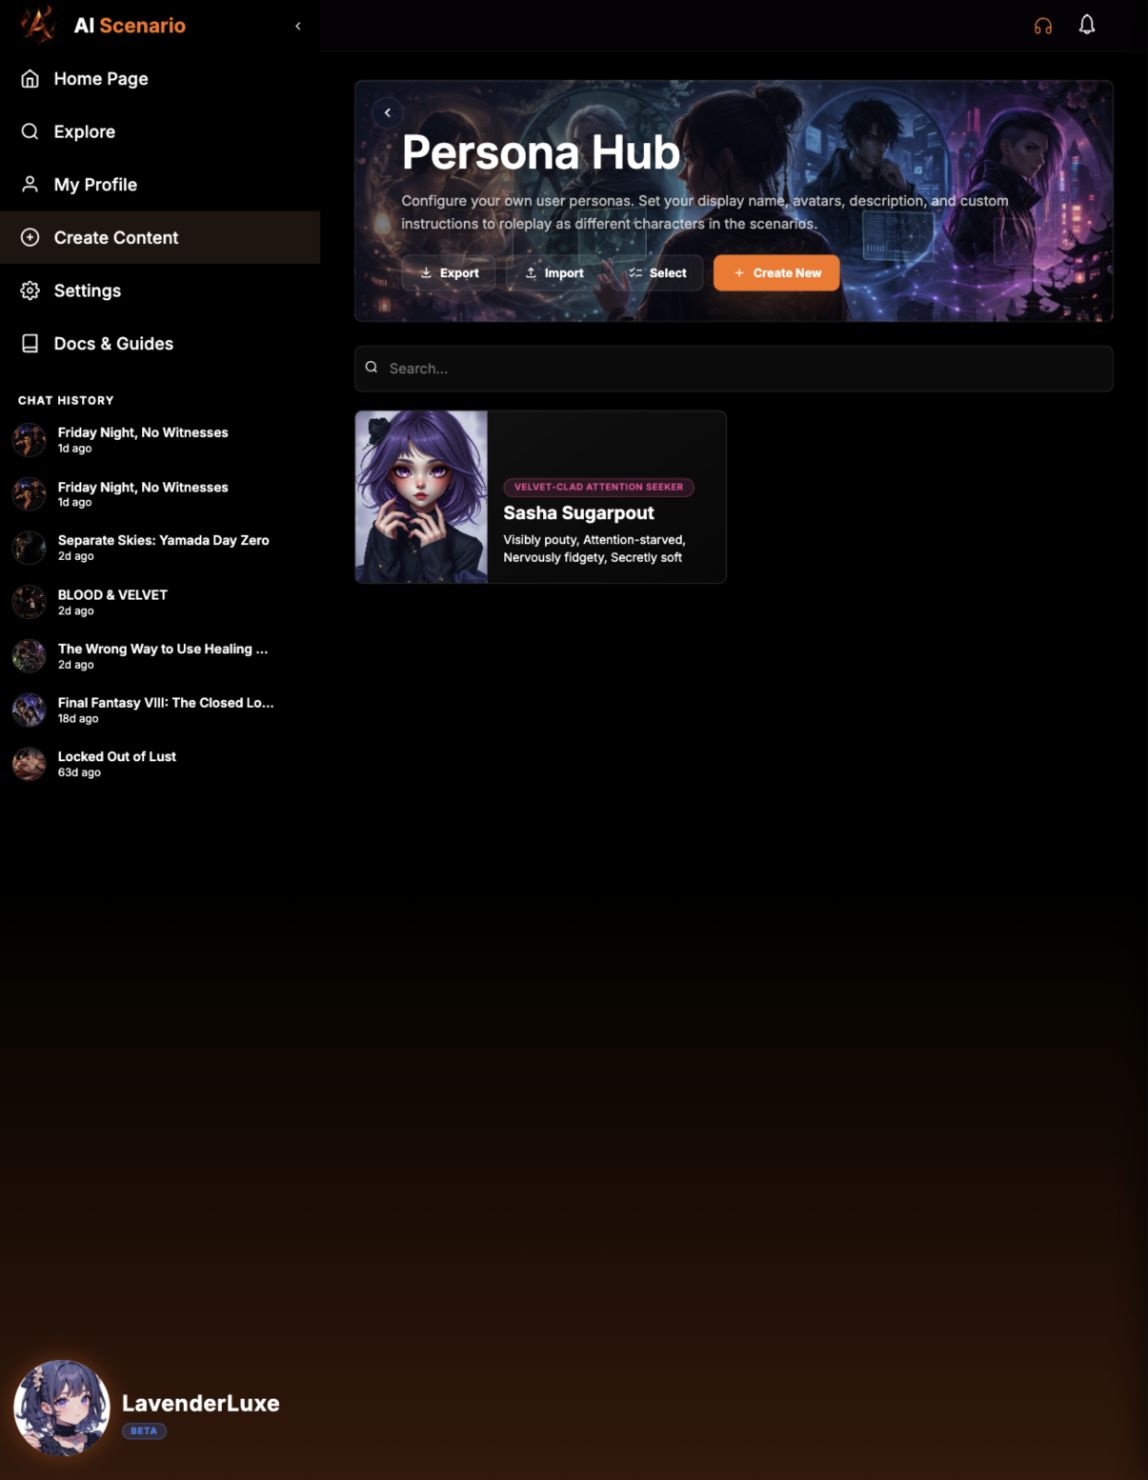
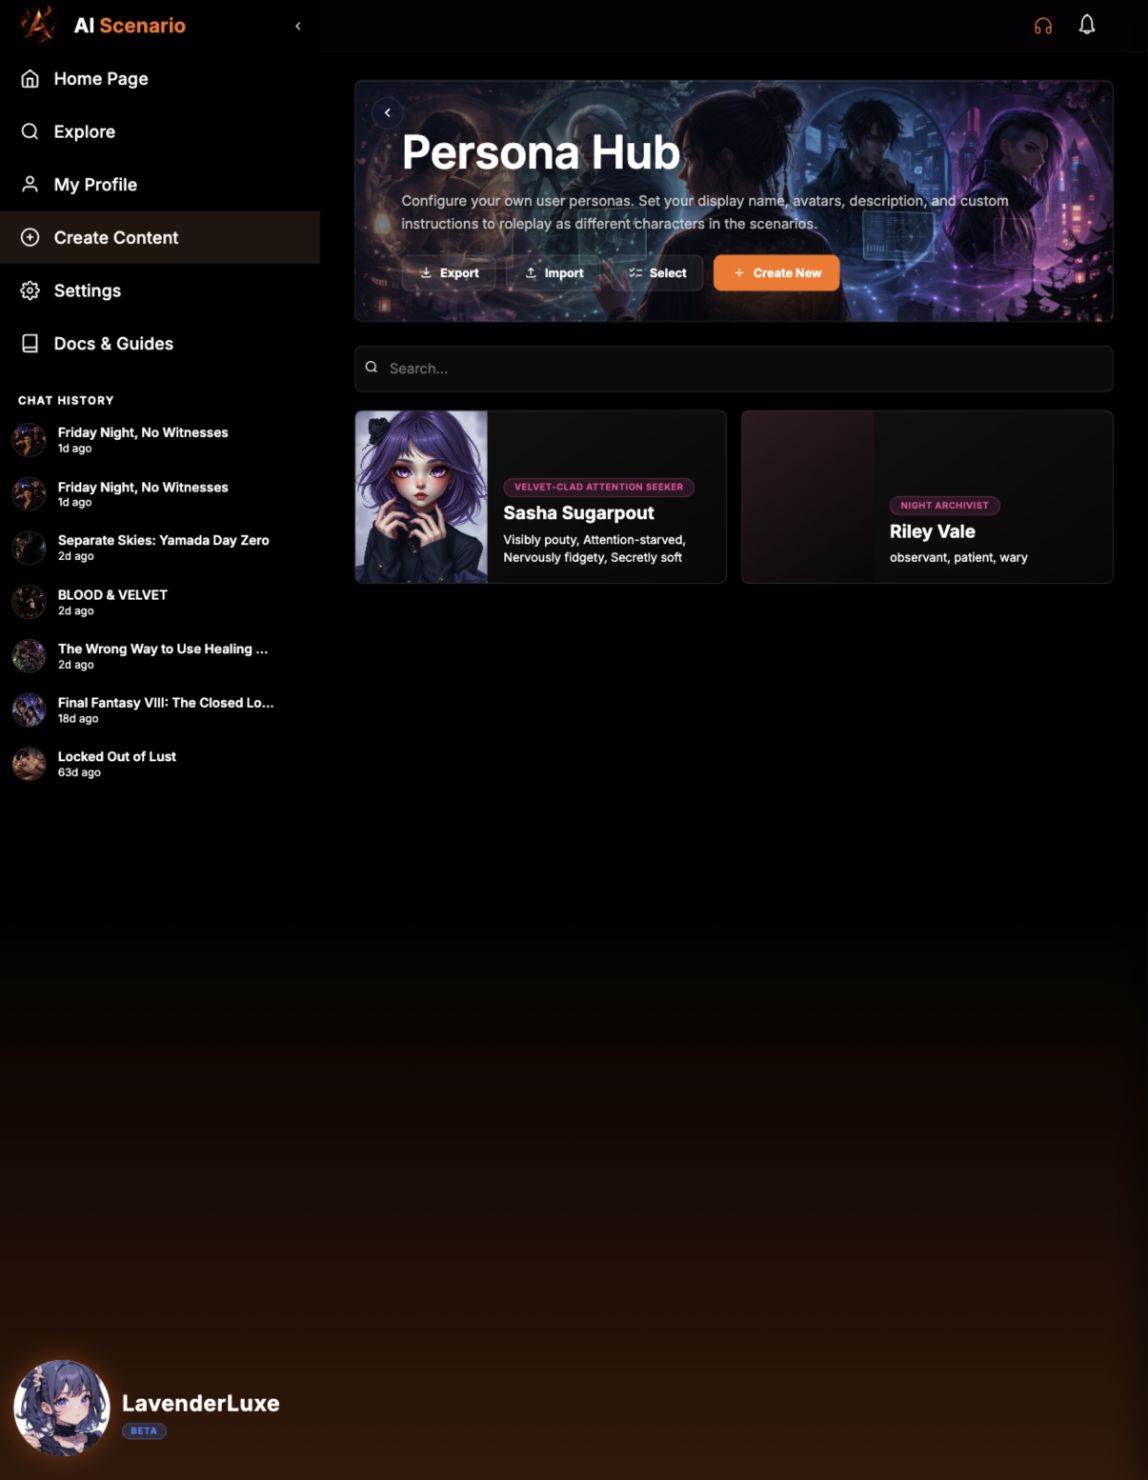
Open Persona Hub
Open Create Content, then select My Personas.
Create a persona
Select Create New.
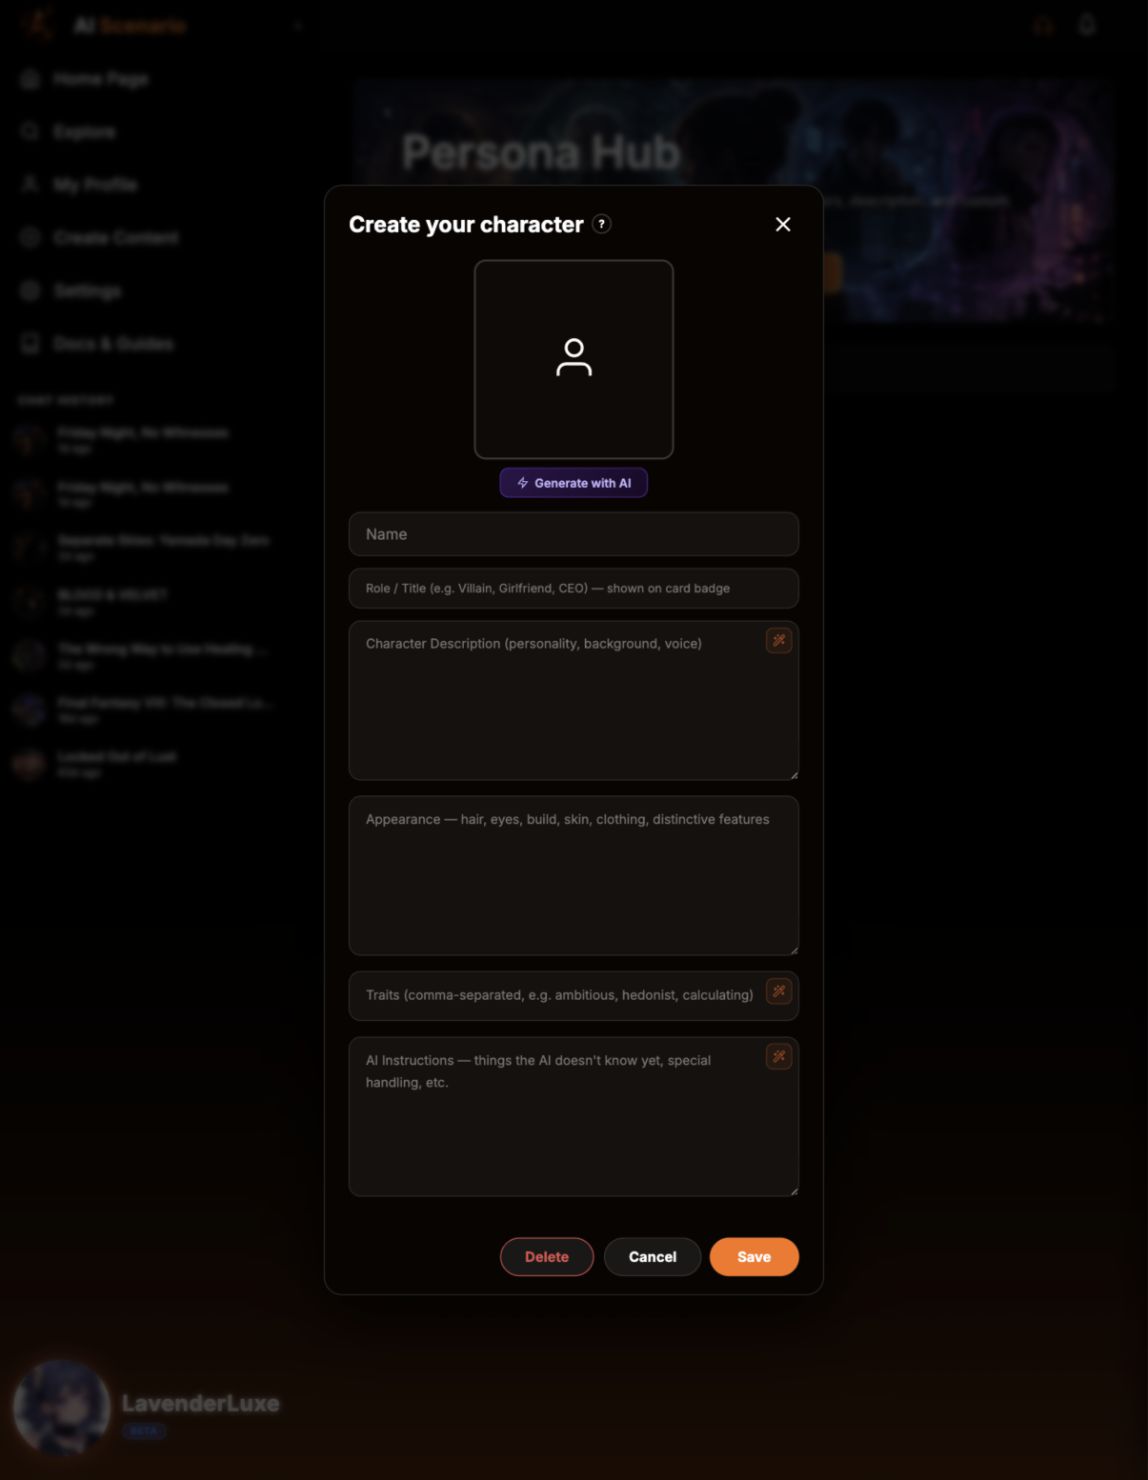
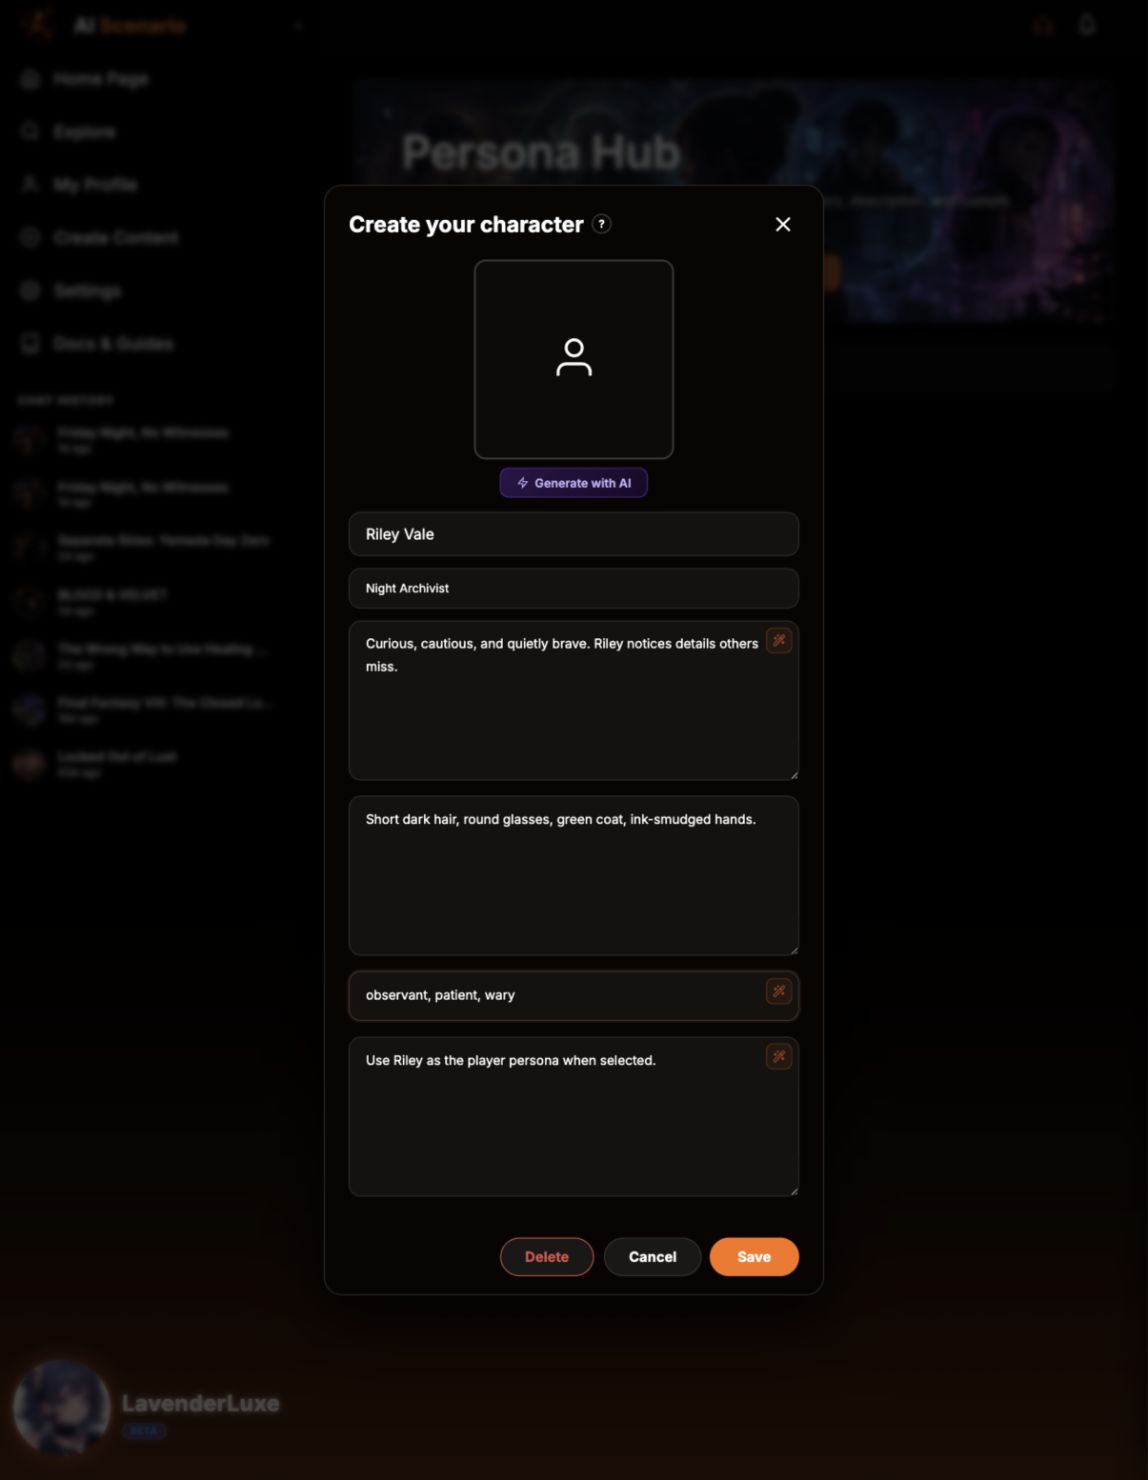
Fill the form
Add a name, role, description, appearance, traits and any special instructions.
Save
Select Save. The new persona appears in Persona Hub.
Create a Reusable Character
Use Character Hub for characters you want to reuse across scenarios.
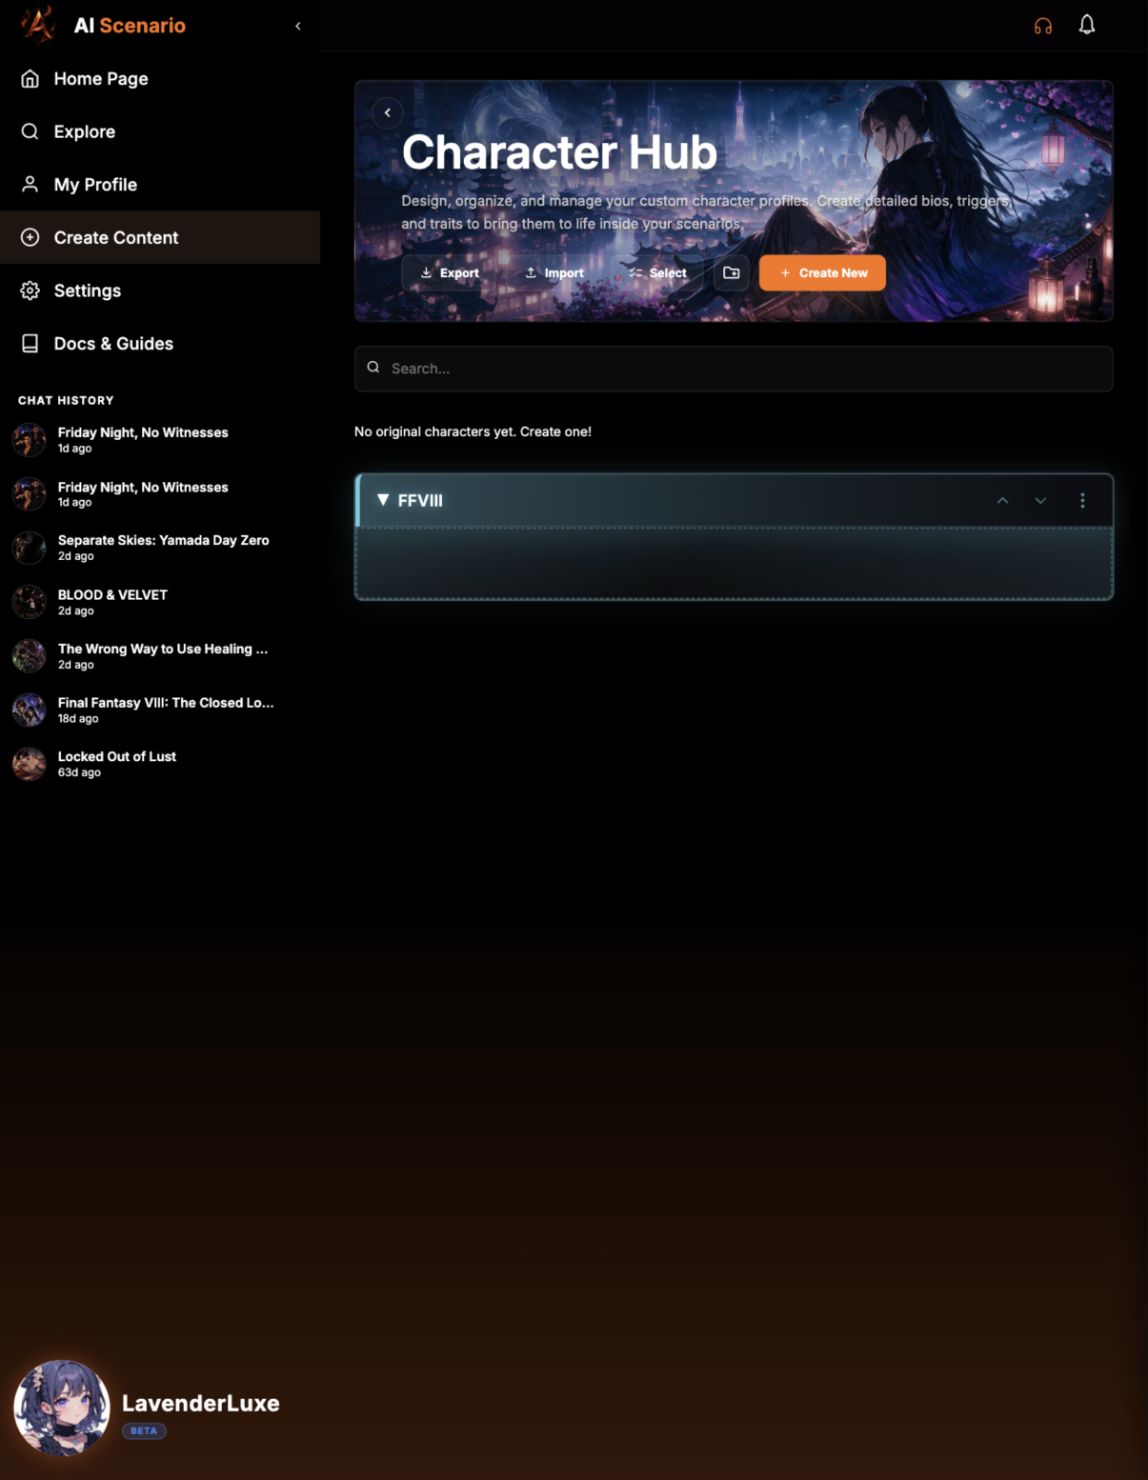
Open Character Hub
Open Create Content, then select Characters.
Organize if needed
Use search, select mode and folders to manage your library.
Create a character
Select Create New.
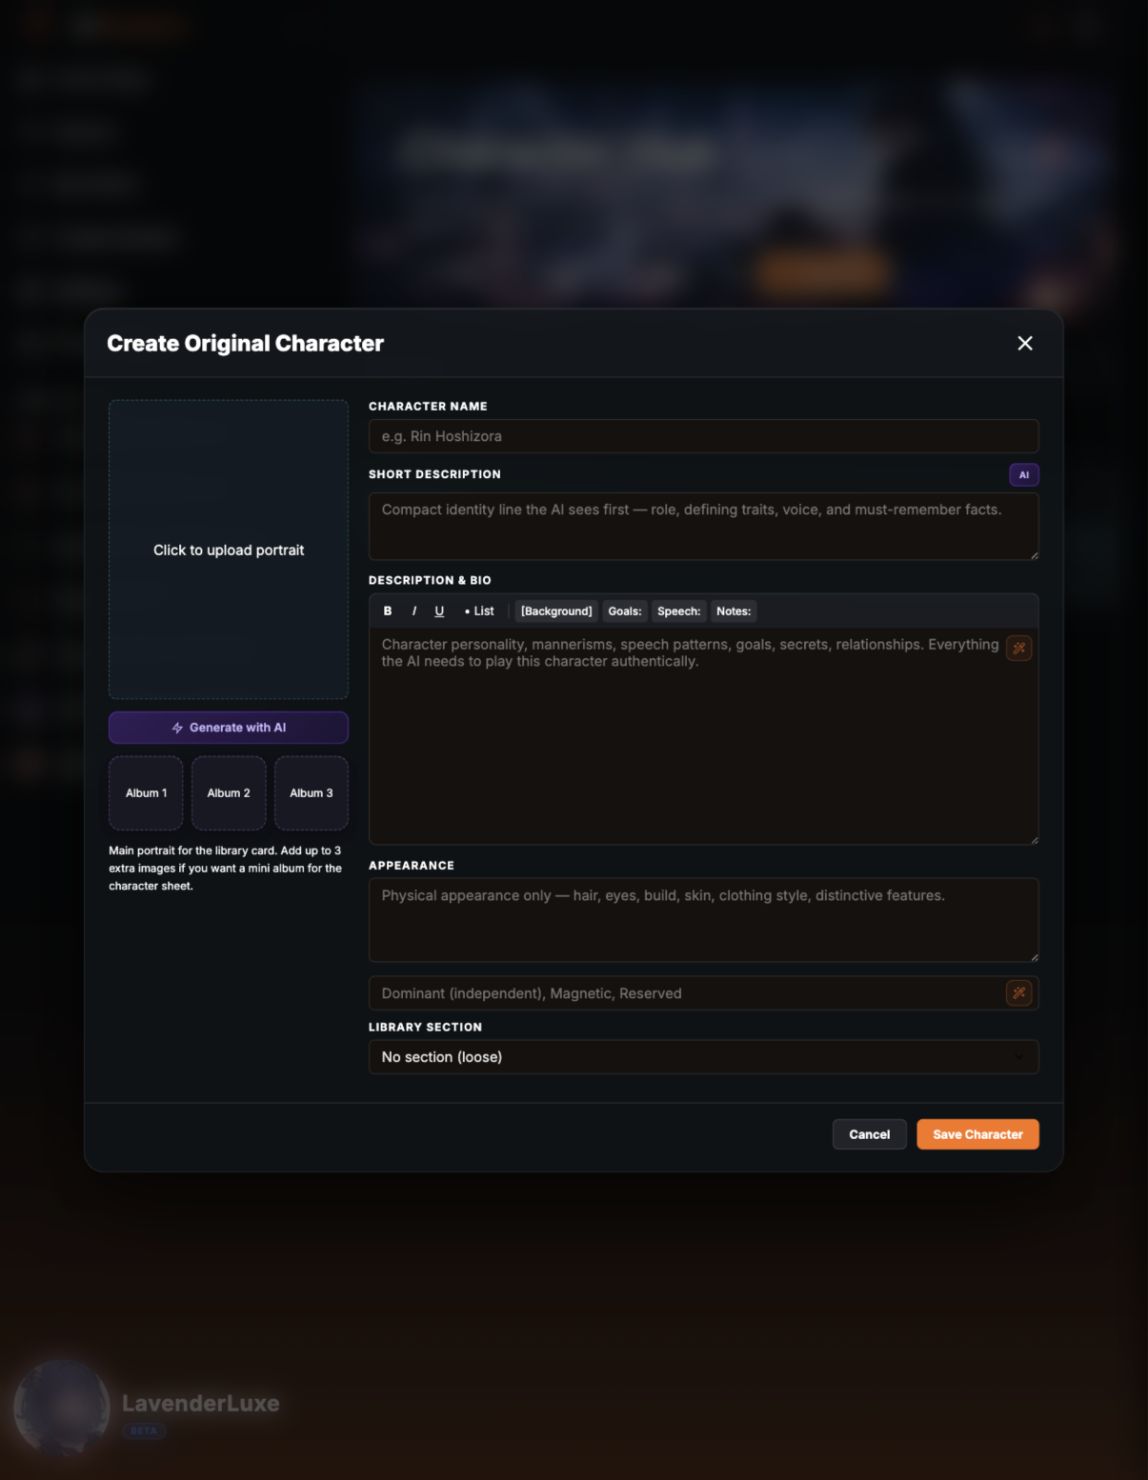
Fill the sheet
Add a portrait, name, short description, bio, appearance and traits.
Save
Select Save Character.
Create Reusable Lore
Use Lore Vault for global lore cards that can be imported into scenarios.
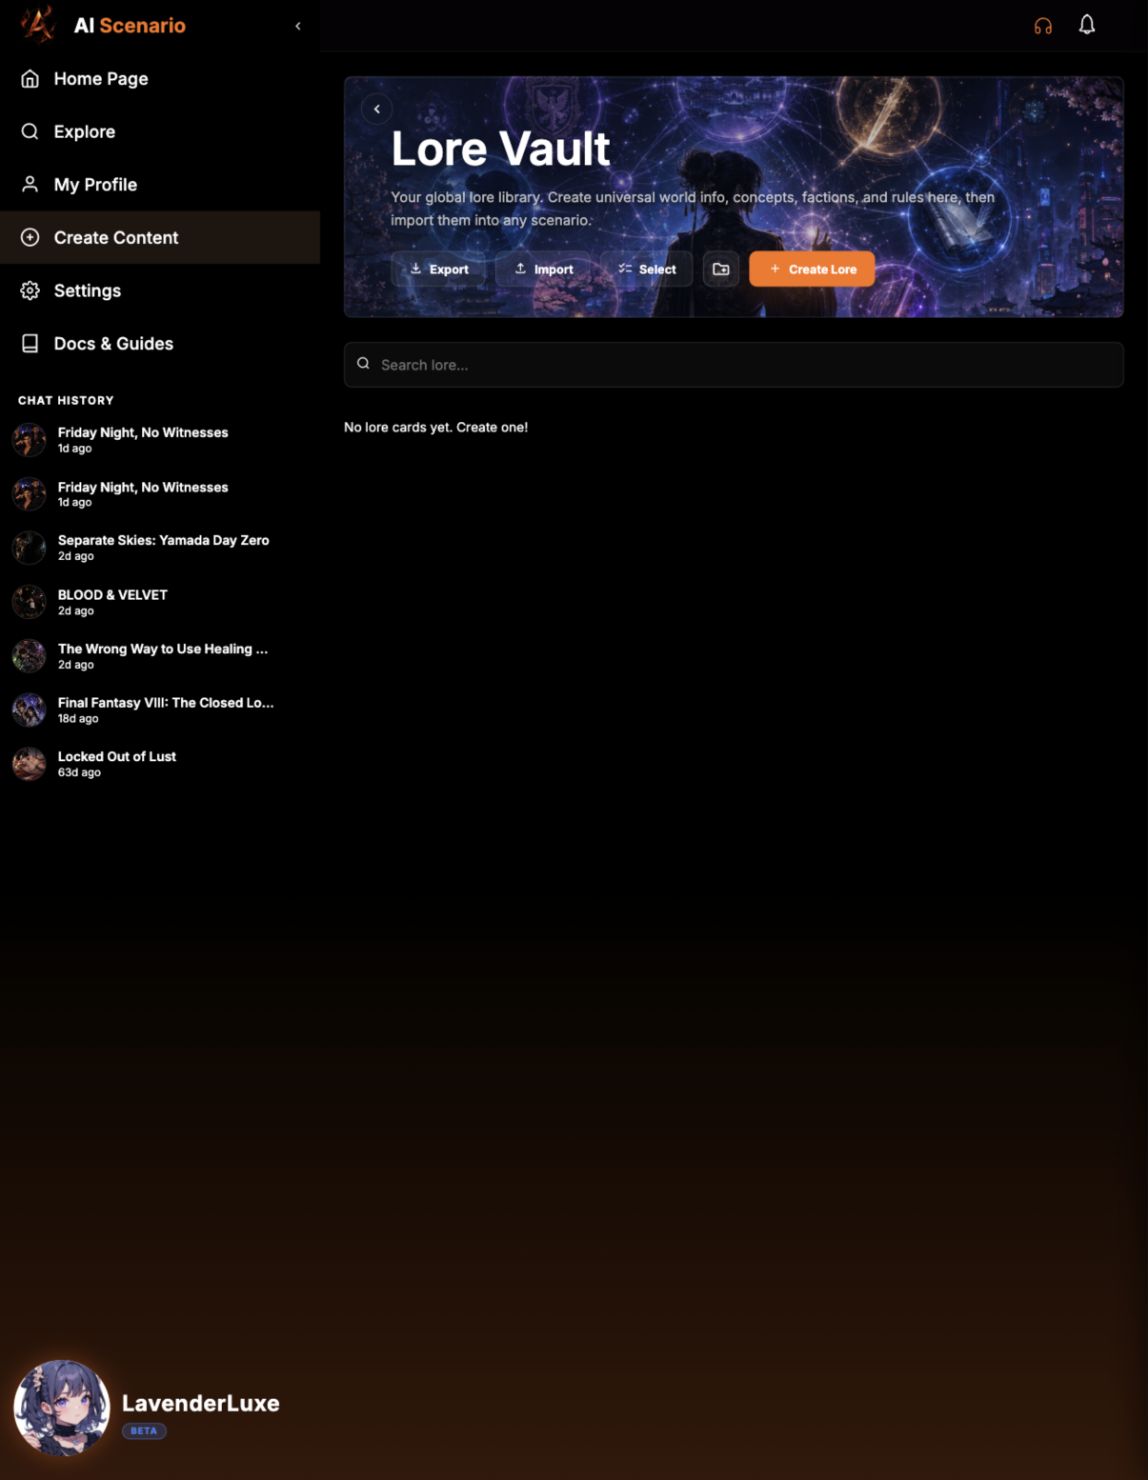
Open Lore Vault
Open Create Content, then select Lore Vault.
Organize if needed
Use search, select mode and folders to manage your lore library.
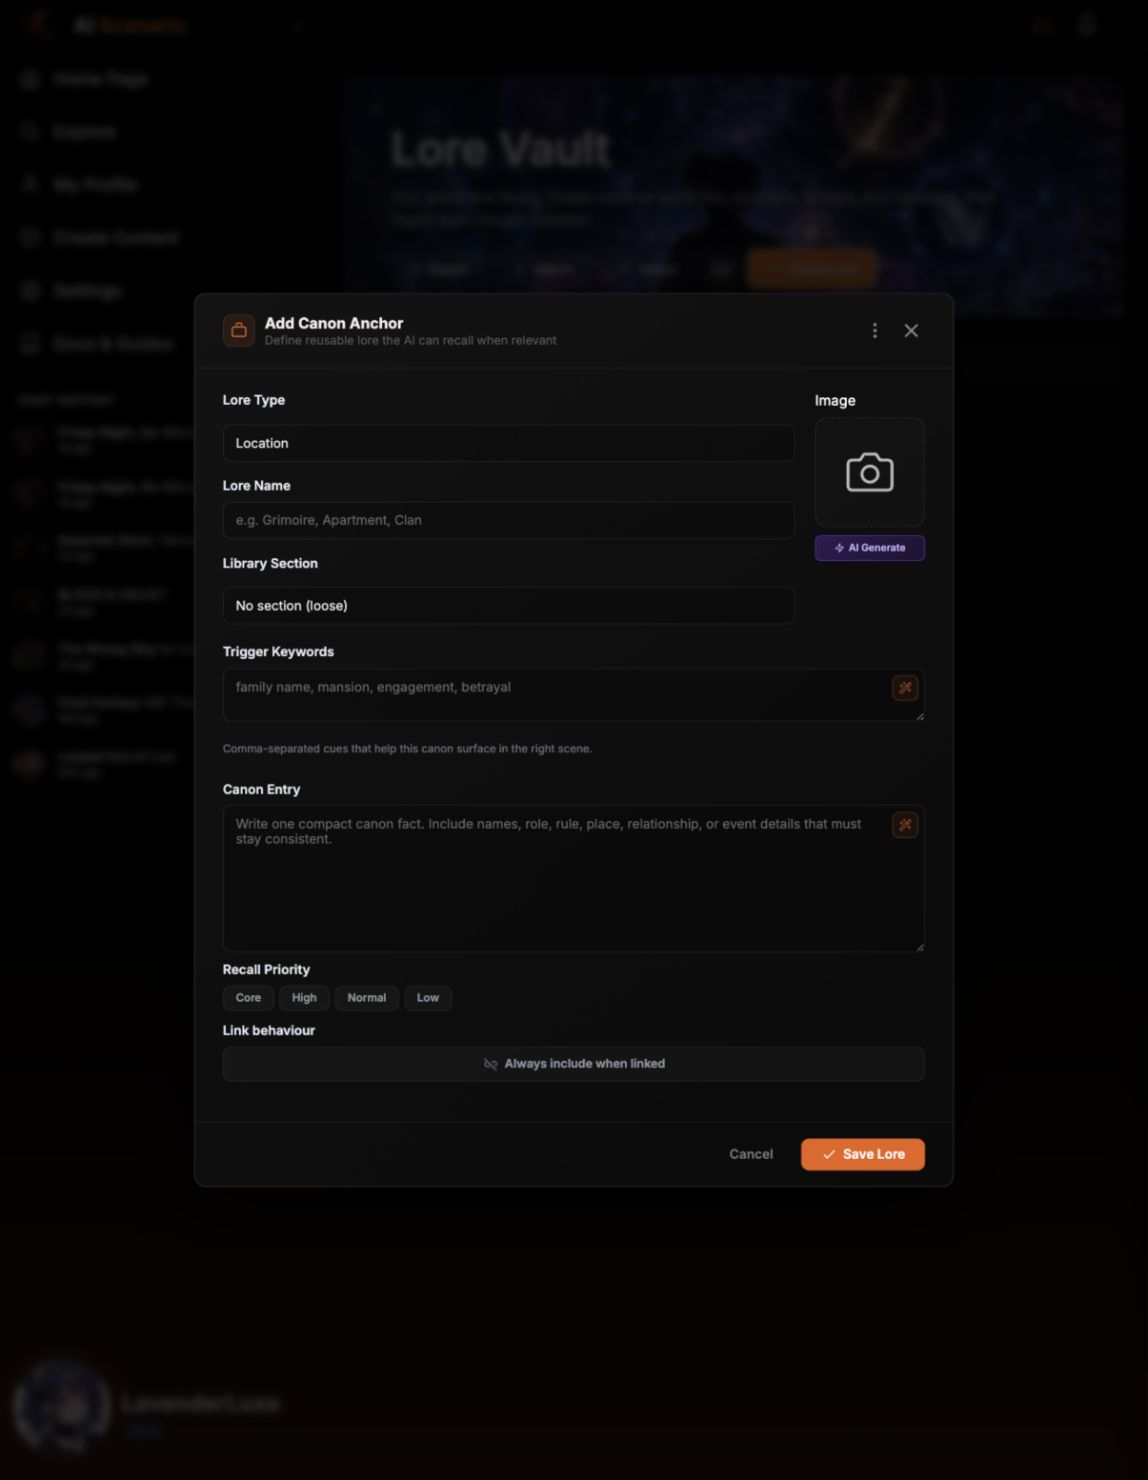
Create lore
Select Create Lore.
Fill the canon card
Choose the lore type, add a name, trigger keywords and a compact canon entry.
Save
Choose a recall priority, then select Save Lore.
Before Publishing
Check the opening
Make sure the scenario name, description and greeting are complete.
Check the cast
Every starting character should have a clear role and description.
Check the canon
Put stable world facts in Canon Anchors or Lore Vault.
Check visibility
Keep drafts private and add content warnings before making a scenario public.